Tuesday, February 9, 2021

INTRODUCTION TO PREPARING MISHLOACH MANOT PACKAGES FOR PURIM GIFT GIVING


This unit of the Bubbie’s Kitchen Collection of recipes for teaching Jewish traditions and cooking differs from the others because the recipes included do not have any particular relationship in and of themselves to Jewish cooking. However, the tradition of giving Mishloach Manot itself during Purim is a very meaningful and symbolic act in both the Ashkenazic and Sephardic communities.

The recipes included in this unit were chosen because they lend themselves to preparation over a period of time and can be frozen easily until such time as they are needed to assemble the packages just before Purim. The assortment was designed to provide a variety of flavors and textures that will make an impressive-looking, delicious, and easily transportable package that can stay at room temperature, if necessary, for a few days.

The Story of Purim and the Giving of Mishloach Manot

During ancient times in Persia, an evil minister named Haman schemed and connived his way into a position of enormous influence with the King. When King Ahasueras decreed that all must bow down to Haman, a Jew named Mordechai, refused. Haman used this opportunity to accuse the Jews of being disloyal and persuaded the king to set a date for the extermination of all the Jews in the country. The date was to be set by the casting of “lots” or Purim in Persian. Unknown to both Haman and King Ahasueras was the fact that the beloved Queen Esther was a Jew and a cousin to the condemned Mordechai. She prepared a feast for the king and, at the risk of her own life, pleaded with the king to spare her people’s lives. This made the king realize what a danger Haman had become and so the king had him hanged on the gallows that Haman had prepared for Mordechai. On the date that had been scheduled for the destruction of the Jews (the thirteenth of Adar), the king allowed them to take vengeance on the enemies who wished to destroy them. On the following day, there was a great celebration of the victory, but in the walled capital city of Shushan, the fighting continued for one more day and so the celebration was delayed. As a result, it is customary for Jews in walled cities to celebrate Purim on the fifteenth of the month of Adar, rather than the fourteenth as elsewhere. This celebration is called Shushan Purim, but in reality, the celebration is such a major event in Israel that most people celebrate both days.

The holiday is marked by a carnival and parade called Ad’lo’yada which comes from the Talmudic suggestion that one should drink enough wine so that he “doesn’t know the difference” between the names Mordechai and Haman during the reading of the Megillah, or scroll which tells the story of Queen Esther. Children and adults dress in masquerade. A special noise-maker called a “grogger” is used during the raucous telling of the story. Its purpose is to blot out the name of Haman each time the name is read during the narrative. A festive meal is eaten afterward called a Purim Se’udah during which merriment and joke-telling are the order of the day. It is also a time to distribute gifts of food called mishloach manot in Hebrew to friends, relatives, and the poor.

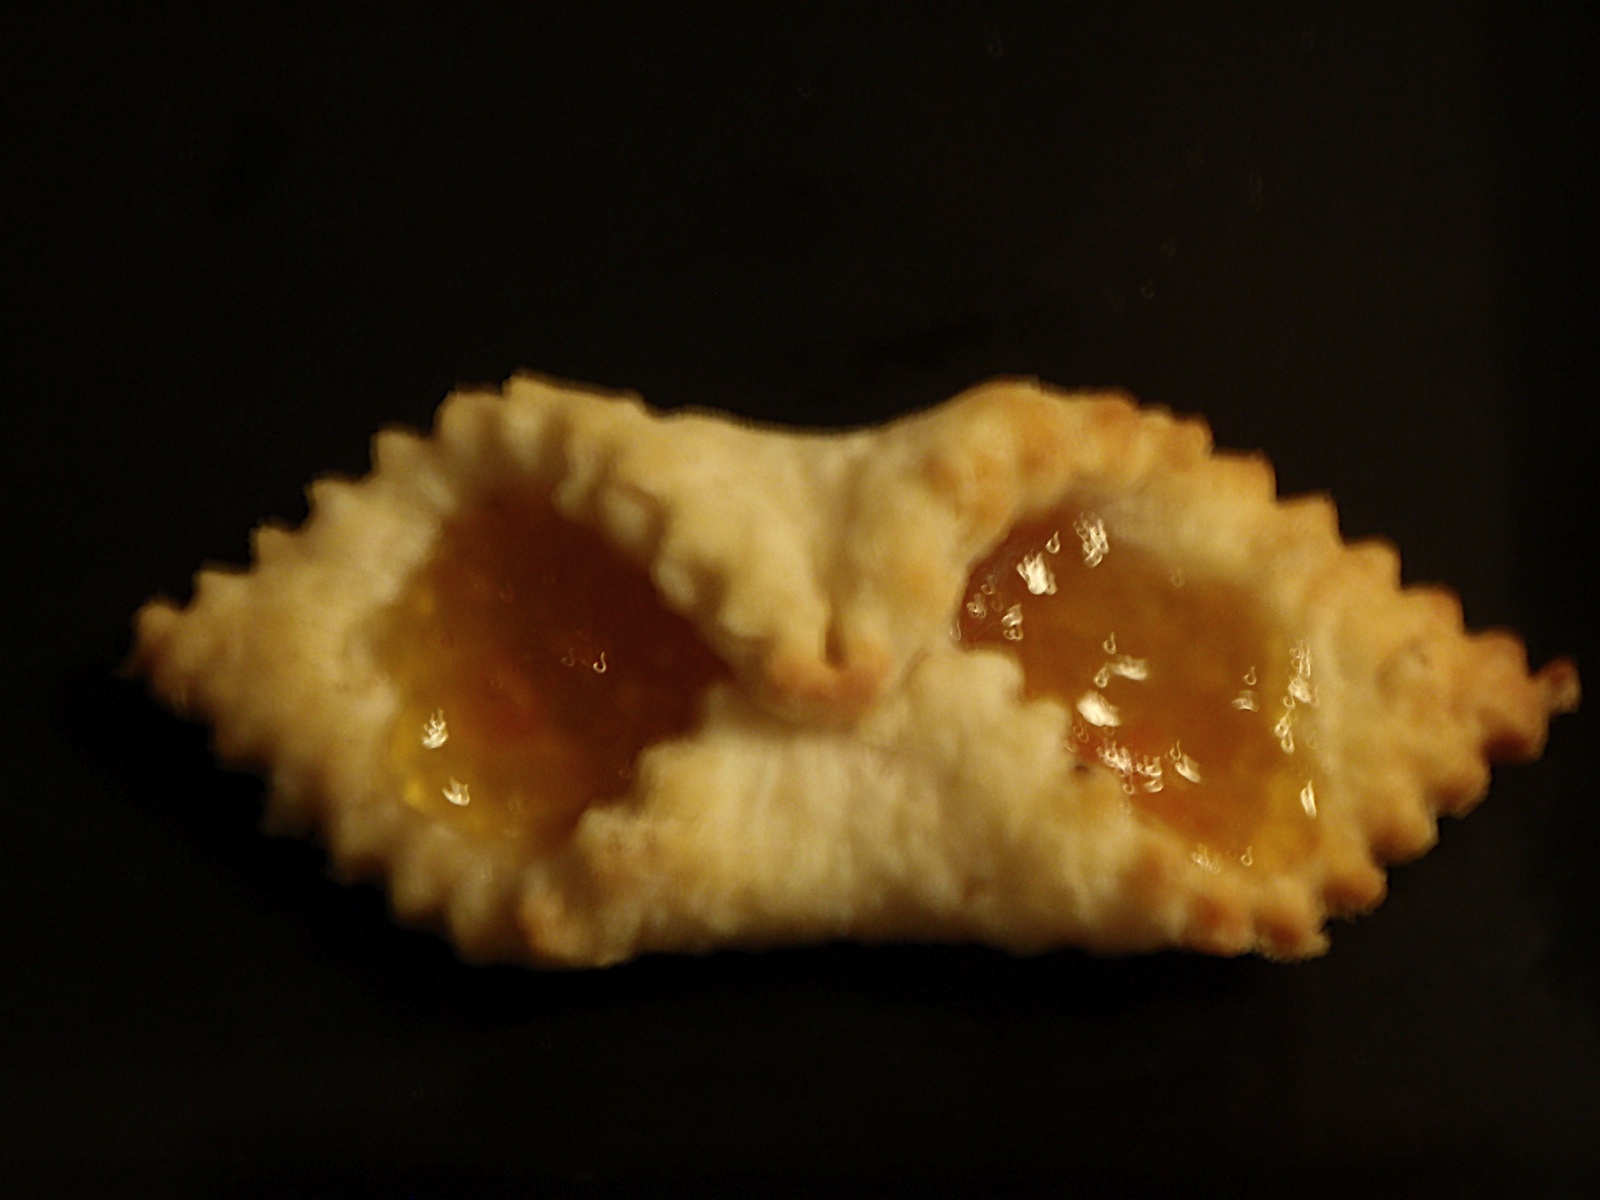
Triangular-shaped cookies called hamantashen are a traditional treat among the Ashkenazim, but how they came to be associated with Purim is obscure. One explanation is that they already existed in the form of mohn tashen, meaning poppy-seed pockets. The similarity of the name of these cookies may have caused them to be renamed Haman taschen as a remembrance of the bribes that lined the evil Haman’s pockets. In Israel, they are known as oznai Haman, or Haman’s ears.

As part of the remembrance, many of the restaurants in Israel are closed during Ta’anit Esther, a yearly fast day on the Jewish calendar that commemorates the fast that the Jewish community and Esther undertook before she risked her life to petition the king.

The Sending of Mishloach Manot

The ninth chapter of the Book of Esther, (verse 19) states: “Therefore the Jews of the villages, that dwelt in the unwalled towns, made the 14th day of the month of Adar a day of gladness and feasting, a holiday, and of sending portions to one another mishloach manot.”

There are many traditions that descend from this one verse:

Haman accused the Jews of being “a scattered, and divided nation.” Thus, the Jewish people send gifts to each other in order to show that they are not divided, but rather are united. The mitzvah of performing acts that unite the (sometimes divisive) community can be achieved equally through the giving of celebratory gifts as well as with the sending of conciliatory words, many of which are suggested in the Torah itself.

Another reason for the mitzvah appears in the Terumat Ha-Deshen (sec. 111) of Rabbi Israel Isserlein (15th century, Vienna), who writes: “It appears that the reason for this mitzvah is so that everyone can fulfill the mitzvah of eating a proper, festive meal on Purim.” Since it is enjoined upon everyone to celebrate, both rich and poor, the expectation is that no one is embarrassed that they may not have the means to celebrate, as gifts should be sent to rich and poor alike, so all have the means to celebrate.

The minimal requirement of the tradition is that every adult Jewish person is required to send, on the day of Purim, at least two ready-to-eat food items to at least one friend. Ready-to-eat food (not items that need further preparation) are specifically used to assemble mishloach manot packages.

An addition to the obligation of sending mishloach manot on Purim is to give money to those who are less fortunate, and it is considered a bigger mitzvah to give money to those in need than to give more people mishloach manot (Kitzur Shulchan Aruch 141:1-2).

A Note on Packaging Mishloach Manot

Purim is the Jewish festival that immediately follows Tu B’Shevat, the “New Year of the Trees” which enjoins upon us a respect for nature and the Earth. Years ago, my packages were assembled on disposable plastic plates enveloped with yards of clear plastic gift wrap, secured with clear tape, and tied in ribbons. In recent times, I have become more ecologically conscious, eschewing these wasteful, harmful products, and seeking out more ecologically-friendly ways to present my packages. If plastic is to be used, I try to send the packages in containers that can be repurposed in the home. There are disposable plates made from pressed, fallen palm leaves that are biodegradable. Even the beautiful cardboard boxes that are for sale online are biodegradable, as are natural baskets. I also like to use tins, which are useful in all kinds of situations and which can be recycled if necessary. My point, here, is: do be conscious of the packaging you are using to present your mishloach manot. Why add to the mountain of trash that is accumulating on our planet? There are many excellent suggestions online for ecological, creative packaging.

I hope you are able to prepare and enjoy these many delicacies and share them with others. They are a sweet legacy from my family to yours!

TABLE OF CONTENTS

CHECKERBOARD SHORTBREAD COOKIES

LEMON BARS

TOFFEE SQUARES

PEANUT BUTTER PINWHEEL COOKIES

LIME CORNMEAL COOKIES

GINGERBREAD TEDDY BEARS

CREAM CHEESE FRILLS

FINNISH STARS

MANGO TEA CAKES WITH WHITE CHOCOLATE GANACHE

MELT-AWAY COOKIES

MINI PECAN PIES

MINI FILLED CHOCOLATE CUPCAKES

LEMON CHEESE LOGS

YEAST DOUGH HAMANTASCHEN

Monday, February 8, 2021

CHECKERBOARD SHORTBREAD COOKIES


These striking-looking, delicious, shortbread cookies are well worth the effort, both for their unique appearance and for their melt-in-your-mouth, not-too-sweet butteriness. Our family cookie collection of recipes, I think, would not be complete unless we included these among them. The cookies themselves are very easy to make, but they require a certain amount of patience and attention to detail to look the way they should.

Checkerboard Shortbread Cookies
(makes 4 to 5 dozen depending on how thick you slice the loaves)

  • 1 cup (2 sticks) unsalted butter, softened
  • 1/2 cup sugar
  • 1 tsp. pure vanilla extract
  • 1/4 tsp. pure lemon extract
  • 1/4 tsp. salt
  • 2-3/4 cups sifted all-purpose flour
  • 3 Tbsp. Dutch-process cocoa powder
  • 1 large egg

1. In the bowl of an electric mixer fitted with the paddle attachment, cream the butter and sugar until light and fluffy, about 2 minutes.

2. Add vanilla extract, lemon extract, and salt.

3. With mixer on low speed, gradually add the flour, scraping down the sides of the bowl two or three times.

4. Turn the dough out onto a clean work surface. It will be loose and crumbly. Knead the dough by pushing small amounts away from you with the heel of your hand for about two minutes. Divide the dough in half.

5. Sprinkle the cocoa powder over one of the halves. Knead  until the cocoa has been fully incorporated.

6. Enclose each half in a piece of plastic wrap and let them rest at room temperature for about half an hour.

7. Unwrap and pat each half into a rough, thick, squarish shape on the plastic wrap. Cover each with a second piece of plastic wrap and roll each half, between the two sheets of plastic wrap, into a roughly seven-by-seven-inch square. You can press stray pieces into place and work the dough with your hands until the desired shape and size is achieved. When finished, both halves should be as close as you can get them to the same size and shape. Refrigerate for at least 30 minutes.

8. Remove plastic wrap and using a long, sharp, thin knife and a ruler, slice each square into nine 3/4-inch-wide strips.

9. Whisk together the egg and 1 Tbsp. water.

10. Cover work surface with plastic wrap. Place three strips of dough on plastic, alternating white and chocolate strips. 

11. Brush tops and in between the strips with egg wash. Gently press strips together. Repeat forming second and third layers, alternating colors to create a checkerboard effect. 

12. Wrap assembled loaf in plastic and refrigerate. 

13. Repeat the process for the second log, reversing the color pattern so that, if the first layer of the first loaf had a chocolate strip in the center, the second loaf should have a plain strip in the center of the first layer. Wrap in plastic and refrigerate second loaf. Refrigerate both for at least 30 minutes, or freeze for 15 minutes.

14. Heat oven to 350°F. Line a baking sheet with a Silpat mat or parchment paper. 

15. Slice each log into 3/8 to 1/4-inch thick slices with a thin, sharp knife. Transfer carefully to baking sheet.

16. Bake until done, about 10 minutes in a convection oven, or 12 in a conventional oven. 

17. Cookies should look crisp and have just the slightest hint of a brown tinge at the edges.

18. Let the cookies cool on the baking sheets for about two minutes before transferring them to a wire rack to cool completely.

These cookies freeze beautifully layered between sheets of waxed paper or parchment in an airtight container.


LEMON BARS

Bar cookies are really easy to make and you have the advantage of making lots of them just by choosing the size into which you want to cut them. I think, if I were to ask my daughter, Jessica, which of the many cookies that we make are her favorite, she would probably choose the lemon bars because she is really fond of tart flavors.

As with the Toffee Squares, the most time-consuming part of this recipe involves pressing the crust layer into the baking pan evenly with your fingers. Do not even think about using anything but fresh lemon juice squeezed directly from a real lemon.

Lemon Bars
  • 1 cup unsalted butter
  • 2 cups sifted all-purpose flour
  • 1/2 cup confectioner’s (powdered) sugar
  • 1-3/4 cups granulated sugar
  • 4 Tbsp. all-purpose flour
  • 1 tsp. baking powder
  • 4 extra-large eggs
  • 6 Tbsp. fresh-squeezed lemon juice
  • 1/2 tsp. grated fresh lemon peel
  • pinch of kosher salt
1. Preheat oven to 350°F.

2. Melt butter; add sifted flour and confectioner’s sugar. 

3. Mix well and pack into an ungreased 9 x 13-inch baking pan.

4. Bake for 15 minutes.

5. Meanwhile, mix together sugar, flour, and baking powder.

6. Add eggs, one at a time, then lemon juice, lemon peel and salt.

7. Pour this mixture over the hot crust and return to the oven to bake for an additional 25-30 minutes.

8. Cool and cut into 48 to 60 squares.

These freeze well, layered between sheets of waxed paper in an airtight container.

TOFFEE SQUARES


These are very easy to make and are delicious and sturdy for packaging. Toffee is one of my favorite flavors. They also won’t pull out your fillings like a Heath Bar might, and they look very appealing as well.

Toffee Squares
  • 1 cup unsalted butter (2 sticks)
  • 1 cup brown sugar (light or dark)
  • 1 egg yolk
  • 1 tsp. vanilla
  • 2 cups all-purpose flour
  • 8 oz. chocolate chips
  • finely chopped nuts (optional)
1. Cream butter with sugar until light and fluffy. 

2. Beat in egg yolk, vanilla and flour. 

3. Spread evenly on ungreased 11"x 15" jelly roll pan. 

4. Bake at 350°F. for 20-25 minutes. 

5. Remove from oven and immediately spread with 8 oz. of chocolate chips while still hot. Chocolate chips will melt within a few minutes. Spread chocolate evenly across the surface. 

6. While still warm, sprinkle with finely chopped nuts, if desired. 

7. Chill before slicing into squares. 

These freeze beautifully.

PEANUT BUTTER PINWHEEL COOKIES


While assembling these cookies, I thought I was doing a terrible job. I cut the first batch of dough into a rectangle, but then realized that a precise rectangle would not really make a difference in the look of the finished cookies after they were cut into slices. The filling has a tendency to thicken as it cools and is more difficult to spread on the soft dough, so I recommend working quickly to get the rolls made up before the hardening occurs. Rewarming the mixture does not improve the texture once the process of hardening has begun. An offset spatula is a useful tool for spreading.

In the end, all the cookies baked into perfect little swirls even though the next batch I rolled out was irregularly shaped and free-form. If you like peanut butter, these are the cookies for you!

Peanut Butter Pinwheel Cookies
  • 3/4 cup unsalted butter
  • 2 cups all-purpose flour
  • 1/2 cup dairy sour cream
  • 1 6-oz. package (1 cup) peanut-butter-flavored pieces
  • 1/2 cup smooth peanut butter
  • 1/2 cup sifted powdered sugar
For dough:
1. In a large mixing bowl, cut butter into flour until the mixture resembles coarse crumbs. If using an electric mixer with paddle attachment, keep a lowest speed just until crumbs form.

Stir in sour cream and beat on low speed just until mixture forms a ball.

For filling:
1. In a medium saucepan, melt peanut-butter-flavored pieces over low heat, stirring constantly.

2. Stir in peanut butter.

3. Remove from heat and stir in sugar. Use immediately.


To assemble:
1. Halve dough. On a surface sprinkled lightly with additional powdered sugar, roll each dough half into an approximately 12 x 9-inch rectangle.

2. Spread half of the filling on each rectangle.

3. Roll up tightly from the long side.

4. Wrap in plastic wrap and chill for 1 to 2 hours or until firm.

To bake:
1. Cut rolls into half-inch slices.

2. Place on an ungreased baking sheet and bake at 350°F. for 15-18 minutes in a convection oven; 25-30 minutes in a conventional oven until edges are lightly browned.

These cookies freeze well, stacked between layers of waxed paper in an airtight container.

Makes about 3 dozen.

LIME CORNMEAL COOKIES


Click here for additional photos. 

These are my absolute favorites of all the cookies the family makes. I love food with texture, and cornmeal gives these a little extra crunch and flavor. The lime is a tart, terrific counterpoint to the sugary glaze.

Several points could give you trouble, but if you watch out for them, these are worth the effort. One is that the dough is very sticky. I have provided a quick-time here of our system for keeping the cookies uniform and unstuck. Do not skip the parchment paper! Once the bottom of the glass gets seasoned by pressing a few, they tend to stick less. For the first one, spray the bottom of the glass with non-stick cooking spray before dipping it in the cornmeal. Another tricky area is the consistency of the glaze. With all glazes of this type, whether on cookies or cakes, drip a ribbon of glaze with your spoon or beater across the top surface of the glaze mixture. Count to 10. The ribbon should take 10 seconds to disappear into the rest of the mixture. If it takes much longer, add a few drops of lime juice or water. If it disappears too quickly, add some powdered sugar until the correct consistency is reached. Once the cookies have been glazed, give them 12 to 24 hours for the glaze to set completely before attempting to stack or pack them between sheets of waxed paper. Of course, it should go without saying that you should only use beautiful fresh limes and their juice for this recipe. Use a microplane to easily get the relatively large amount of grated rind needed. 


Lime Cornmeal Cookies
  • 1 cup (2 sticks) unsalted butter, room temperature
  • 1 cup sugar
  • 1 large egg
  • 2 Tbsp. freshly grated lime zest (about 6 limes including for glaze)
  • 2 Tbsp. freshly squeezed lime juice
  • 1 Tbsp. freshly grated orange zest (about 2 medium oranges)
  • 1/2 tsp. pure almond extract
  • 1-1/2 cups all-purpose unbleached flour (I use Ceresota or Heckers)
  • 1 cup yellow cornmeal, plus more for coating glass
  • Lime glaze
1. In the bowl of an electric mixer fitted with the paddle attachment, cream butter and sugar until light and fluffy, 3 to 4 minutes. 

2. Add egg; beat until just blended. 

3. Add citrus zests, lime juice and almond extract. 

4. With the mixer on low speed, add flour and cornmeal. Continue beating until well blended. Wrap the dough in plastic wrap, shaping the dough into a thick disk and chill until firm, about 1 hour. 

5. Preheat the oven to 350°F. 

6. Line two baking pans with Silpats or parchment paper. 

7. Fill a small bowl with cornmeal. 

8. Using a 1-1/4 inch ice-cream scoop, form balls from chilled dough. Place balls on prepared sheets, spaced about 3 inches apart. 

9. Dip bottom of a medium drinking glass into cornmeal. Flatten balls with the bottom of the glass until dough is about a little less than 1/4-inch thick. 

10. Bake cookies until crisp and light-golden brown around the edges, 14 to 16 minutes in a standard oven, 10 minutes in a convection oven. 

11. Transfer baking sheets to a wire rack, and let the cookies cool completely. 

12. Use the scoop to measure out about one tablespoon-full of glaze and release in the center of the cookie, allowing it to disperse almost to the edges. Let glaze set. Cookies may be frozen between sheets of waxed paper. 

Makes about 4 dozen. 

Lime Glaze
Makes 1-1/2 cups
  • 3-1/2 cups confectioners’ sugar (approximately)
  • 7 Tbsp. freshly-squeezed lime juice (approximately)
  • 1-2 Tbsp. freshly-grated lime zest
1. Measure confectioners’ sugar into a medium bowl. 

2. Add lime juce; stir until smooth. 

3. Drip a ribbon of glaze with your spoon across the top surface of the glaze mixture. Count to 10. The ribbon should take 10 seconds to disappear into the rest of the mixture. If it takes much longer, add a few drops of lime juice or water. If it disappears too quickly, add some powdered sugar until the correct consistency is reached. 

4. Stir in lime zest. Use glaze immediately.

GINGERBREAD TEDDY BEARS


Click here for additional photos.

This gingerbread recipe is not technically gingerbread because it contains no ginger, but it is delicious nevertheless. I have reduced the amount drastically of baking powder called for in the original recipe because there was always a trace of a metallic flavor in the original. Besides making gingerbread men and women, years ago, I began making gingerbread teddy bears. I even made gingerbread red heifers for a Bible-study group. Eventually, when craft stores began to carry markers made with food coloring, we graduated to cookies frosted with thinned royal icing, the better to use them like coloring books. Little fingers are much more nimble at placing tiny decorative candies into the small dabs of royal icing "glue." Depending on how thin and crispy you want your cookies to be, this recipe makes dozens of cookies.

Gingerbread Teddy Bears
  • 3/4 cup honey
  • 1-3/4 cup sugar
  • 1/4 cup butter
  • 1/3 cup fresh lemon juice
  • 1 Tbsp. finely grated lemon peel
  • 6 cups all-purpose flour (Ceresota or Heckers)
  • 2 Tbsp. double-acting baking powder
  • 1-1/2 tsp. ground cinnamon
  • 1 tsp. ground cloves
  • 1/4 tsp. ground nutmeg
  • 1/4 tsp. ground cardamom
  • 1/8 tsp. kosher salt
  • 1 large egg
  • 1 large egg yolk
  • Non-stick cooking spray
  • Food-color markers and candy decors for decorating
  • Food coloring if desired

1. In a heavy 4- to 5-quart saucepan, bring the honey, sugar and butter to a boil over high heat, stirring with a large spoon until the sugar is dissolved and the butter melted. Remove the pan from the heat and mix in the lemon juice and peel. Cool to room temperature.

2. Meanwhile, sift flour, baking powder, cinnamon, cloves, nutmeg, cardamom and salt together into a large mixing bowl. 

3. Beat in 2 cups of the flour and spice mixture. Mix in the egg and egg yolk. Then, beat in the remaining 4 cups of the flour and spice mixture. This will make a very thick, crumbly and sticky dough. Flour your hands lightly and knead until the dough is smooth, pliable and still slightly sticky. Do not refrigerate.

4. Roll out to desired uniform thickness on well-floured pastry cloth with a stockinette-covered rolling pin. Cut out desired shapes as closely together as possible to avoid re-rolling as much as possible and place on non-stick coated cookie sheets. 

5. Bake in preheated 325°F oven, about 7-8 minutes for convection and 10-12 minutes for standard.

6. When cool, use a pastry bag with a #2 or #3 plain tip to decorate with lines of royal icing. 

7. Allow to dry for a few hours if you intend to frost cookies completely. Thin some royal icing to desired consistency for frosting with a few drops of water at a time until a ribbon of the icing dripped over the top melts and disappears into the icing at the end of ten seconds. If you accidentally thin it too much, you can thicken it with a few spoonfuls of confectioner's (powdered) sugar. The right consistency is absolutely essential to avoid frustration, so take your time and get it just right before loading the decorating bag. Add food coloring as desired. 

8. The thinned icing can be loaded into a disposable plastic decorating bag without any couplers or metal tips. Just be sure to snip a very tiny hole in the bottom of the bag once loaded. Cookies, once frosted, should dry for at least 6 hours, preferably overnight before using food color markers. Attach tiny decors with small dabs of unthinned royal icing.

Royal Icing

This icing, which hardens rock solid, was once made with raw egg whites. Years ago, when salmonella became a problem, I switched to using Wilton meringue powder.
  • 1 lb. confectioner's 10x (powdered) sugar
  • 3 Tbsp. Wilton meringue powder
  • 6-10 Tbsp. warm water

Beat at low speed of electric mixer for 7 to 10 minutes.
Makes approximately 3 cups.

CREAM CHEESE FRILLS


These cookies have no sugar in the dough and rely completely for sweetness on the sugar in the preserves, so if you don’t like oohy gooey stick-to-your-teeth-type cookies, these are probably the ones you will like. They are not only beautiful, but also have a melt-in-your-mouth quality that is delicate and delicious. Once we figured out how to keep them from opening up in the center as they baked, with toothpicks, they were a snap to make. Using a fluted pastry wheel to cut them gives them a little bit fancier shape. Fill with a variety of jams for a kaleidoscope of color and flavor.

Cream Cheese Frills
  • 1 cup (2 sticks) unsalted butter
  • 1 tsp. pure vanilla extract
  • 2 cups sifted all-purpose flour
  • 1/2 tsp. kosher salt
  • 1 cup quick oats
  • 1 8-ounce package cream cheese
  • favorite preserves
1. Preheat oven to 425°F.

2. Beat butter and vanilla until creamy. 

3. Add flour, salt and oats; mix well until blended. 

4. Add cream cheese and beat smooth. Wrap, forming a disc shape in plastic wrap and chill thoroughly.

5. Roll out on lightly floured board (I use a pastry cloth and stockinette covered rolling pin) to 1/8-inch thickness. Cut into 2-inch squares with a fluted pastry wheel, pizza wheel, or knife.

6. Place on ungreased cookie sheets. Spoon 1/2 tsp. preserves into center of each square (I use a 1-inch ice cream scoop). 

7. Bring together two opposite corners into center over filling and overlap slightly. Insert a toothpick at an angle away from the direction it would pull open during baking.

8. Bake 10-12 minutes until lightly browned at edges and puffed. Bake for 7 minutes in a convection oven. 

9. Remove toothpicks once cookies have cooled. 

Can be frozen between sheets of waxed paper. Makes about 60 2-inch cookies.

FINNISH STARS

 
These cookies are very distinctive-looking among the assortment, and like the 
Cream Cheese Frills, are delicate and not overly sweet. Also like the frills, they have a tendency to open up in the middle when baking, so we have applied the toothpick trick to these as well. Prunes have gotten a bad rap over the years as food for constipated old folks, but we always liked them. In order to overcome the marketing hurdle, they are now being sold as dried plums. Funny how a plum is something so desirable, yet drying it into a prune makes it undesirable. A special cookie cutter exists to facilitate this particular shape of pinwheel cookie, but the shape is pretty easy to create by hand as well—just a square with the corners cut.
Finnish Stars
  • 1 cup pitted prunes
  • 1 cup water
  • 1/2 cup sugar
  • 1 Tbsp. fresh lemon juice
  • 1-1/4 cups small-curd cottage cheese, sieved
  • 1 cup butter
  • 2-1/4 cups sifted all-purpose flour (I use Ceresota or Hecker’s)
1. Heat prunes, water and sugar in a small saucepan, stirring occasionally, to boiling. Reduce heat; simmer covered until prunes are tender, about 5 minutes. Cool slightly. 

2. Purée in blender or food processor 3 to 5 seconds. Stir in lemon juice. Refrigerate covered 3 hours. 

3. Meanwhile, cream cottage cheese and butter until light and fluffy. Mix in flour. Refrigerate covered with plastic wrap until firm, about 3 hours. 

4. Preheat oven to 400°F. 

5. Divide dough in half. Roll one half on lightly floured surface into an 18 x 12-inch rectangle. (I use a pastry cloth and stockinette-covered rolling pin.) If dough becomes too soft, refrigerate during shaping to firm. 

6. Cut into 3-inch squares. Cut slits with sharp knife from each corner toward center, about 1-1/2 inches (Figure 1). Alternatively, use pinwheel cookie cutter.
7. Place on ungreased baking sheet. Place about 1 tsp. of the prune mixture in the center of each square. 

8. Fold half of each corner over the center, pressing to form pinwheel (Figure 2). 

9. Put a plain wooden toothpick down through the four corners in the center to help hold them in place while baking. Bake until golden, 10 to 12 minutes in a conventional oven, 8 minutes in a convection oven. 

10. Remove toothpicks. Cool on wire racks. Repeat with remaining dough and prune mixture. 

11. When cool, pipe a star or dollop of royal icing into the center to cover the hole and keep the corners together. 

Makes about 4 dozen. 

Once icing has set completely, cookies may be stored in a single layer in covered shallow trays in the freezer.
Royal Icing (See blog post for gingerbread people or click on the link above.)

MANGO TEA CAKES WITH WHITE CHOCOLATE GANACHE


We make so many different kinds of cookies in my family, but we are always on the lookout for something new and different that incorporates a favorite ingredient, in this case, fresh mangoes. If you have never cut into a mango, be advised that it has a large, white, flat seed at the center to which the pulp clings tenaciously. Cut in half a little off center as close to the seed as possible. Score the pulp in the halves with a sharp knife into squares and invert the peel to pop out cubes of the pulp to make separation from the peel easier. Wikipedia calls this the hedgehog method.

The recipe came from the Food Network site a few years ago. The cookies were delicious and sturdy, but looked so plain compared to the others we make that I needed a way to spiff them up a bit. After making a batch of mini chocolate ganache cupcakes, I had some of the white chocolate ganache left over and decided to add a tiny drop of pink food coloring to distinguish these cookies and add some color to our assortment. By the following year, everyone still remembered them and asked me to make the pink cookies again, so they did distinguish themselves among all the others. Alex still can’t eat them, though, unless I leave some of them plain.

The raspberry extract (McCormick’s) is a relatively esoteric ingredient that I only found recently. When I used it this year, I noticed that it contains propylene glycol, not one of my favorite ingredients. Since I already had bought it, I used it, but the cookies are delicious without it.

Mango Teacakes with White Chocolate Ganache
  • 1 stick (1/2 cup) unsalted butter, room temperature
  • 1 cup sugar
  • 1/2 cup mango puree (pulp from one large, ripe mango puréed in a food processor)
  • 1-1/2 tsps. lemon zest (use a microplane)
  • 1 tsp. raspberry extract (optional)
  • 1 tsp. pure vanilla extract
  • 1 large egg
  • 2-1/2 cups all-purpose flour (I use Ceresota or Hecker’s)
  • 1/2 tsp. baking soda
  • 1 tsp. baking powder
  • 1/2 cup buttermilk
1. Preheat oven to 400°F.

2. In a large mixing bowl, cream butter and sugar together with an electric mixer. Add the mango purée, lemon zest, extracts and egg and mix well.

3. In a medium mixing bowl, sift the flour, baking soda, and baking powder. On very low speed, carefully stir portions of the dry ingredients into the creamed mixture, alternating with the buttermilk.

4. Drop portions of the dough with a 1-1/4-inch ice cream scoop onto parchment-lined cookie sheets.

5. Bake for 12 to 15 minutes in a conventional oven; 10 minutes in convection oven, or until golden brown. Transfer to a wire rack to cool. Top with White Chocolate Ganache. Makes about 4 dozen.

White Chocolate Ganache
  • 5 ounces white chocolate, finely chopped
  • 1/4 cup heavy cream
  • 1/2 Tbsp. unsalted butter
  • 1 small drop pink food coloring (optional)
1. In a small heavy saucepan, bring the cream to a simmer. Remove from heat and add the chocolate. Let stand five minutes, then stir until smooth. 

2. Stir in the butter until incorporated. 

3. Stir in the food coloring, if using.

4. Let stand until set enough that a ribbon of the ganache, dripped across the top of the mixture with a spoon, takes a count of 10 before disappearing back into itself. If it sets too much, rewarm gently on very low heat and cool again until the correct consistency is reached. 

5. Use a mini ice cream scoop (1-inch) to scoop a portion onto the center of each cookie. Let the chocolate set completely for 12-24 hours before packing between layers of waxed paper. 

These cookies freeze very well. 

MELT-AWAY COOKIES


These cookies, visually, are probably the stars of the cookie assortment that our family makes. A few years back, Jess told us a humorous story about pandemonium in her office because of these. She had brought a large plate to work for her colleagues to share. As we make almost 30 different cookies, the plate had just one or two of each type. Rather than choose individual cookies, her co-workers had chosen to slice each one up into miniscule slivers so that each one could have a taste of all of them. Over several days, the tray had diminished until just the one large, beautiful heart-shaped cookie remained. Then, a colleague who had been away for a few days came back and ate the last cookie. When the others discovered that the last cookie was missing, and that the whole large cookie had been eaten by one person, they were aghast. The disingenuous soul who had eaten the cookie was severely castigated by the others and Jessica called me to see if there were any more remaining, but there were none.

Adele and I made these together this year as there are several steps involved, although none are particularly difficult, especially if you roll the dough out using a well-floured pastry cloth and stockinette covered rolling pin. We poured the melted chocolate through a wide-necked funnel into a squirt bottle to apply the chocolate around the top cut-out heart. If the chocolate starts to set, let the bottle sit for a few minutes in a hot water bath. An individual tea strainer with jointed handle makes a great little device for neatly shaking on powdered sugar. This year, I discovered a delicious organic strawberry spread from Kirkland brand at Costco, and we were delighted with the intense taste and texture both in these cookies and in the Cream Cheese Frills.

Melt-Away Cookies
  • 3/4 cup unsalted butter
  • 2-1/3 cups all-purpose flour
  • 1 cup sugar
  • 2 extra-large eggs
  • 1 tsp. baking powder
  • 1/2 tsp. kosher salt
  • 1/2 tsp. ground cinnamon
  • 1/2 tsp. almond extract
  • 1 6 oz. pkg. (1 cup) semisweet chocolate morsels
  • 1/2 cup preserves, jam, or jelly
  • powdered sugar
1. In a large mixer bowl, beat butter on medium to high speed for 30 seconds.

2. Add half of the flour, sugar, eggs, baking powder, salt, cinnamon, and almond extract.

3. Beat thoroughly and then beat in remaining flour.

4. Divide dough in half. Wrap in plastic wrap, shaping dough into thick discs and chill for at least one hour or until firm.

5. On a lightly floured surface, roll half of the dough 1/8-inch thick. (Keep the remaining dough in the refrigerator until ready to roll.) Cut into shapes with cookie cutter.

6. Place on ungreased baking sheets.

7. With a smaller cutter, cut out centers from half of the unbaked cookies.

8. Bake at 375°F. for about 5 to 7 minutes or until the edges are firm and bottoms are very light brown. Cool.

9. Repeat with dough scraps and remaining dough.

10. In a small, heavy saucepan, melt chocolate pieces over low heat, stirring constantly. Spread about 1 tsp. of the melted chocolate on the bottom of each cookie with the removed center. Immediately place chocolate side atop whole cookies to form a sandwich.

11. Sift powdered sugar atop cookies.

12. Spoon preserves or jelly in the center hole of each cookie.

Makes about 30-40 sandwich cookies.

These freeze well layered between sheets of waxed paper in an airtight container.

MINI PECAN PIES


These were very time-consuming in the beginning as we attempted to neatly spoon the egg mixture over the pecans so that errant drips would not cause the pastry to stick to the pan when baked. Then, I hit on the idea of pouring the egg mixture through a funnel into a squirt bottle and voila! It became neat and easy to get the mixture where it was supposed to go. A small, thin offset spatula is invaluable for removing these types of pastries from the pan.

Mini Pecan Pies
  • 6-oz. cream cheese, softened
  • 1 cup unsalted butter, softened plus 2 Tbsp.
  • 2 cups all-purpose flour
  • 2 beaten extra-large eggs
  • 1-1/2 cups packed brown sugar
  • 2 Tbsp. unsalted butter, softened
  • 1 Tbsp. pure vanilla extract
  • dash of kosher salt
  • 1-1/2 cups broken pecans
1. Blend cream cheese and the 2 cups of butter. Stir in flour. Wrap dough in plastic wrap and chill for at least 1 hour.

2. Shape dough into 48 1-inch balls. A mini ice-cream scoop is useful to portion the dough.

3. Place in ungreased 1-3/4-inch mini-muffin pans; press dough over bottoms and completely up sides of pans.

4. In small bowl, beat together egg, brown sugar, the 2 Tbsp. butter, vanilla, and salt just until smooth.

5. Divide the pecans among the pastry shells.

6. Spoon or squirt (from a squirt bottle) about 1/2 Tbsp. of the egg mixture over the pecans in each shell.

7. Bake in 325°F. oven for 25-30 minutes, or until filling is set and pastry is golden.

8. Cool and remove from pans. They are easier to remove while still slightly warm.

These freeze well, in a single layer, in an airtight container. Makes approximately 48 mini pecan pies.

MINI FILLED CHOCOLATE CUPCAKES


These mini cupcakes are yummy, self-contained, and sturdy little bites that freeze beautifully and have that yin and yang quality that attracts the eye.

Mini Filled Chocolate Cupcakes
  • 1-1/2  cups all-purpose flour
  • 1/4 cup unsweetened cocoa powder
  • 1/2 tsp. salt
  • 1 cup sugar
  • 1 tsp. baking soda
  • 1  cup water
  • 1/3 cup vegetable oil
  • 1 Tbsp. plain white vinegar
  • 1 tsp. pure vanilla extract

Topping
  • 8 oz. cream cheese, softened
  • 1 egg
  • 1/3 cup sugar
  • 1/8 tsp. salt
  • 6 oz. chocolate chips

1. Line mini cupcake pans with decorative paper mini cupcake liners.

2. Mix first five ingredients with electric mixer.

3. Add next four ingredients and mix well.

4. Fill mini cupcake papers half full.

5. Beat cream cheese until smooth. Add egg, sugar, and salt, and continue beating until creamy, scraping down sides of bowl with a rubber spatula occasionally.

6. On lowest speed or by hand, beat in chocolate chips.

7. Top each cupcake with a teaspoon-full of the creamy mixture.

8. Bake at 350°F. for 15-20 minutes.

9. While still slightly warm, remove from pans using a small offset spatula.

10. These freeze beautifully in an airtight container.

Makes about 5 dozen mini cupcakes.

LEMON CHEESE LOGS

These cookies are crispy, melt-in-your mouth delicacies that are fun to make and are especially appealing to make with children because the dough is firm enough to be easily handled; and who doesn’t like dipping almost anything in chocolate and sprinkles?

Lemon Cheese Logs
  • 1 cup sugar
  • 1 cup unsalted butter
  • 1 small package (3 ounces) cream cheese, softened
  • 1 egg yolk
  • 2-1/2 cups all-purpose flour (I use Ceresota or Hecker’s)
  • 1 cup finely chopped walnuts
  • 1/2 tsp. salt
  • 1/2 tsp. grated lemon peel (use a microplane)
  • 1 small package (6 ounces) semi-sweet chocolate morsels, melted
  • colored decorating sprinkles
1. Cream sugar, butter and cream cheese in large mixer bowl until light and fluffy. Beat in the egg yolk. 

2. Stir in flour, walnuts, salt and lemon peel. 

3. Refrigerate covered at least two hours. 

4. Heat oven to 325°F. Shape about 1 Tbsp. of the dough into a log, one inch long. Repeat with remaining dough. 

5. Place on ungreased baking sheets. 

6. Bake until light brown, about 12 minutes in conventional oven; about 8 minutes in a convection oven. 

7. Cool on wire racks. 

8. Dip ends of logs in chocolate; dip chocolate coated ends into decorating sprinkles. 

9. Let stand on wire racks until chocolate sets. 

Can be frozen, stacked between layers of waxed paper in airtight containers. Makes about 8 dozen.

INTRODUCTION TO PREPARING MISHLOACH MANOT PACKAGES FOR PURIM GIFT GIVING

This unit of the Bubbie’s Kitchen Collection of recipes for teaching Jewish traditions and cooking differs from the others because the recip...